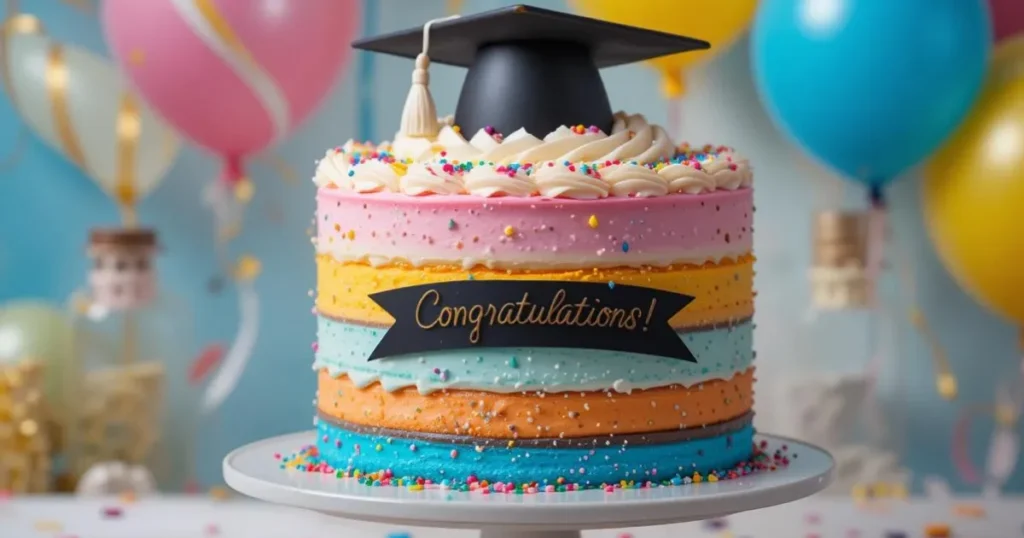
Graduation is a monumental occasion that deserves a celebration as special as the achievement itself. Whether you’re celebrating a high school diploma or a college degree, nothing conveys “Congratulations!” quite like a beautifully crafted homemade graduation cake. In this step-by-step guide, I’ll walk you through everything you need to know—from baking the cake to decorating it with flair. Let’s dive in and make this graduation unforgettable!
Why Bake a Graduation Cake?
Before diving into the details of baking, let’s discuss why making a graduation cake at home is a fantastic choice:
- Personal Touch: A homemade Graduation cake shows thoughtfulness and effort. It’s a personal gift that can be tailored to the graduate’s tastes.
- Cost-Effective: Baking at home can save you money compared to ordering from a bakery, especially when you consider the size and customization options.
- Creative Outlet: This is your chance to express your artistic side and have fun in the kitchen!
Ingredients You’ll Need
Let’s gather our ingredients! Here’s what you’ll need for both the cake and frosting:
For the Cake:
- 4 ⅞ cups all-purpose flour
- 4 ½ cups granulated sugar
- 3 ¾ teaspoons baking powder
- 1 ½ teaspoons salt
- 1 ½ cups unsalted butter (room temperature)
- 9 large eggs
- 2 ¼ cups buttermilk (room temperature)
- 1 tablespoon clear vanilla extract
- Gel food coloring (optional, for decoration)
For the Frosting:
- 12 ounces cream cheese (softened)
- 1 ½ cups unsalted butter (softened)
- 9 cups powdered sugar
- 2-4 tablespoons heavy cream (if needed)
For Decoration:
- Black and white fondant for the graduation cap and tassel
- Edible adhesive or water for securing fondant pieces

Step-by-Step Guide to Baking a Graduation Cake at Home
Step-by-Step Baking Instructions
Now that we have our ingredients ready, let’s get started with the baking process!
Step 1: Preheat Your Oven
Start by preheating your oven to 350°F (175°C). This will help ensure that your cakes cook thoroughly.
Step 2: Prepare Your Cake Pans
Prepare two 10-inch round cake pans and one smaller 6-inch pan for the graduation cap by greasing and flouring them. Adding parchment paper at the bottom can further prevent sticking.
Step 3: Mix the Batter
In a large mixing bowl, beat together the softened butter and granulated sugar until the mixture is light and airy—this should take about 3 to 5 minutes. This step is crucial as it incorporates air into your batter, making your Graduation Cake light and fluffy.
Next, incorporate the eggs one at a time, ensuring each egg is fully mixed in before adding the next. Then, mix in the vanilla extract until everything is well blended.
Whisk the flour, baking powder, and salt together in a separate bowl. Gradually incorporate this dry mixture into your wet ingredients, alternating with buttermilk. Start and finish with the flour mixture—this helps maintain the batter’s structure.
If you want to add some color to your Graduation Cake, now’s the time! You can mix in gel food coloring until you achieve your desired shade.
Step 4: Bake the Cakes
Pour the batter evenly into your prepared pans. Place them in the preheated oven for approximately 30-35 minutes, or until a toothpick inserted into the center comes out clean. The edges should begin to separate from the sides of the pan.
Once baked, allow them to cool in their pans for about 10 minutes before carefully transferring them to wire racks to cool completely.
Step 5: Make the Frosting
While your cakes are cooling, prepare your frosting. In a large bowl, beat together softened cream cheese and butter until smooth and creamy—about 3 minutes.
Gradually add in powdered sugar while mixing on low speed until combined. Increase speed to medium-high and continue beating until fluffy. If your frosting seems too thick, add heavy cream one tablespoon at a time until you reach your desired consistency.
Decorating Your Graduation Cake
Now comes the fun part—decorating! Here’s how to create an eye-catching graduation theme:
Step 6: Level Your Cakes
Once cooled, use a serrated knife to level off any domed tops of your cake layers. This ensures that your layers stack evenly and look professional.
Step 7: Assemble Your Cake
Set one layer of cake on a serving plate or cake stand. Spread an even layer of frosting on top before adding the second layer. Repeat these steps for any extra layers you may have.
Take your time with this step; it makes all the difference in achieving a polished look!
Step 8: Final Frosting Layer
After chilling, apply a thicker layer of frosting over the entire Graduation Cake using an offset spatula or bench scraper for smoothness. Patience is key here; it really enhances the final appearance!
Step 9: Create Graduation Cap and Tassel
For the graduation cap:
- Roll out black fondant into a square that will cover your smaller round Graduation Cake or styrofoam piece.
- Place it on top of your smaller cake using edible glue or water to secure it.
- To create a tassel, roll out white fondant into thin strips and gather them together at one end before attaching them to your cap.
Tips for Successful Cake Decorating
- Use Quality Ingredients: The better quality ingredients you use, especially for butter and vanilla extract, will enhance flavor.
- Room Temperature Ingredients: Make sure your butter, eggs, and buttermilk are at room temperature for better mixing.
- Keep It Cool: If you’re working with fondant or intricate decorations, keep everything cool by working quickly or refrigerating components as needed.
- Practice Makes Perfect: If you’re new to decorating cakes, practice on parchment paper first or try making small test cakes!
Frequently Asked Questions (FAQs)
What flavors can I use for my graduation cake?
You can customize your Graduation Cake with flavors like vanilla, chocolate, lemon, or even red velvet! Just ensure that whatever flavor you choose complements your frosting.
How can I make my cake look more festive?
Consider adding edible glitter or sprinkles that match your graduate’s school colors. You could also use themed decorations like mini diplomas or caps made from fondant.
Can I make this cake ahead of time?
Absolutely! You can bake and frost your cake up to two days in advance. Simply keep it in an airtight container in the refrigerator.
What if I don’t have fondant? Can I still decorate my cake?
Definitely! You can use additional frosting for decorations or even fresh fruit or chocolate shavings for an elegant touch.
How do I transport my graduation cake?
If you need to transport it, place it in a sturdy box or on a flat surface in your vehicle. Keep it cool if possible!
Conclusion
Baking a graduation cake at home is not only rewarding but also allows you to personalize it for that special graduate in your life. With these step-by-step instructions and tips, you’ll create a delicious centerpiece that celebrates their achievements beautifully. So roll up your sleeves, gather those ingredients, and let’s make some sweet memories!
Remember that every bite of this homemade creation will carry with it love and pride—perfectly fitting for such an important milestone! Happy baking!


1 thought on “Step-by-Step Guide to Baking a Graduation Cake at Home”
Comments are closed.